
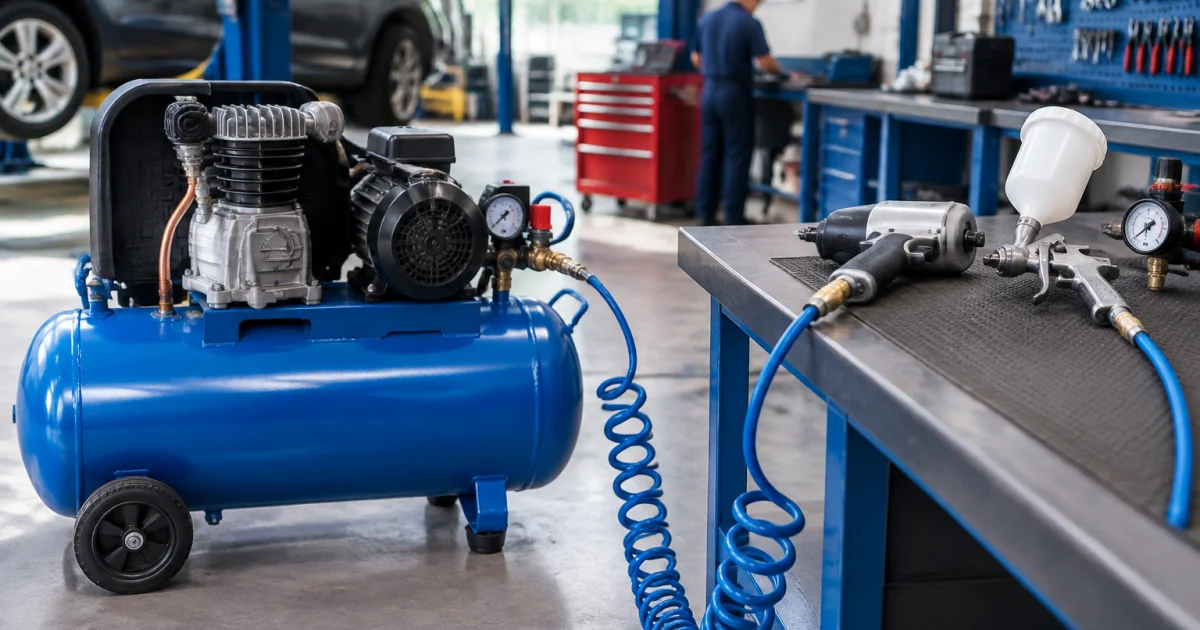
Piston Air Compressor Malaysia: How to Size Tank Capacity and CFM for Workshop Tools (Practical Step-by-Step Method)
Buying a piston compressor for a workshop often goes wrong for one reason: the compressor is sized by “horsepower” or “tank size” alone, not by the air demand (CFM) and how your tools actually run. The result is familiar—pressure drops during an impact job, paint finishes suffer, and the pump runs hot because it never gets a break.
This tutorial shows a practical sizing method you can use in an automotive workshop, SME maintenance bay, or small production area in Malaysia. You’ll estimate the real CFM requirement, choose a realistic working pressure, and then select a receiver tank size that reduces pressure swing without hiding a fundamental CFM shortfall. The same steps apply whether you’re comparing single-stage vs two-stage, oil-lubricated vs oil-free piston compressors, or deciding if you should move up to a rotary screw for continuous demand.
Step 1: List your air tools and capture the right “CFM” numbers
Start by listing every tool or machine that will use compressed air. Include both the obvious tools (impact wrench, spray gun) and “quiet” consumers such as blow guns, tyre inflators, pneumatic cylinders, and small air-operated pumps.
Next, collect each tool’s air consumption from the tool manual or nameplate. You’ll usually see one of these:
- SCFM/CFM at a stated pressure (e.g., “6 CFM @ 90 psi”). This is the most useful.
- L/min at a stated pressure. You can convert to CFM by dividing L/min by 28.3.
- Average vs peak. Some tools quote peak consumption during trigger-on. For sizing, be conservative: assume closer to peak for continuously-triggered tools like sanders and spray guns.
Important: A compressor’s brochure may show “displacement” or “piston displacement” which is higher than usable air delivery. For comparing models, use delivered air / FAD (free air delivery) at the pressure you need whenever it’s available. If only one number is shown and it’s unclear, treat it cautiously and ask the supplier to confirm usable output at pressure.
Quick conversion cheatsheet
- 1 CFM ≈ 28.3 L/min
- 90 psi ≈ 6.2 bar (common workshop reference point)
Step 2: Decide your working pressure (and stop overspecifying it)
Many workshops set the compressor higher than necessary “just in case”. That often increases running temperature, leaks, and electricity use—without solving the real issue (insufficient CFM). Set your pressure based on tool requirements and the pressure loss through your piping, hose, FRL, and couplers.
Typical reference points in workshops:
- General air tools often specify around 90 psi (about 6–7 bar) at the tool inlet.
- Spray guns can be sensitive to pressure stability. They may operate lower at the gun, but need stable regulated pressure and clean, dry air.
- Tyre inflation may use higher pressure at the hose, but usually not continuous flow.
As a practical method, choose a target of tool inlet pressure (what the tool needs) and then allow margin for distribution losses. If your longest hose run is long, fittings are restrictive, or filters are undersized, your system pressure drop grows quickly.
Rule of thumb for planning: if tools need 90 psi at the point of use, many workshops set compressor cut-out around 115–125 psi and regulate down at each drop. The exact numbers depend on your setup—avoid pushing pressure higher to “fix” a CFM problem.
Step 3: Calculate “effective simultaneous CFM” using duty cycle (this is the step most people skip)
Not every tool runs continuously. An impact wrench might be triggered in short bursts; a blow gun may be used intermittently; a DA sander can be near-continuous. Sizing only by adding every tool’s peak CFM creates an oversized purchase, while assuming “one tool only” creates a painful undersize.
Use this simple method:
- Pick your busiest 10–20 minutes (e.g., tyre service rush or a prep-and-paint workflow).
- For each tool, estimate duty factor (0 to 1):
- 0.2 = short bursts
- 0.5 = on/off regularly
- 0.8–1.0 = almost continuous
- Effective CFM = Tool CFM × Duty factor
- Add a leakage + growth allowance (commonly 10–25% depending on how tight your system is and whether you expect more bays/tools later).
Worked example (typical small automotive workshop)
Assume these tools could be used in the same busy period:
- 1/2″ impact wrench: 5 CFM, duty 0.3 → 1.5 effective CFM
- Tyre inflator: 2 CFM, duty 0.2 → 0.4 effective CFM
- Blow gun: 8 CFM, duty 0.2 → 1.6 effective CFM
- DA sander: 10 CFM, duty 0.7 → 7.0 effective CFM
- Small spray gun touch-up: 7 CFM, duty 0.5 → 3.5 effective CFM
Total effective = 14.0 CFM. Add 20% allowance = 16.8 CFM.
This is the number you should compare to compressor delivered air at your chosen pressure. If your compressor cannot deliver close to this, the tank will only delay the pressure drop—it cannot create air you don’t have.
Step 4: Choose tank capacity to control pressure swing (and understand what the tank can and cannot do)
The receiver tank (in litres) is your buffer. It smooths demand spikes, helps water drop out, and reduces rapid cycling. But it’s not a substitute for sufficient CFM.
Use tank sizing to answer two questions:
- How stable do I need pressure to be? Painting and air tools feel better with less swing.
- How often can I accept the pump cycling? Very small tanks can cause frequent starts/stops; very large tanks can hide an undersized pump for a short time but still lead to long run times.
A practical way to size the tank (no heavy maths)
For most workshop piston systems, start with these practical ranges, then validate with your workflow:
- Light intermittent tools (inflation, blow gun, occasional impact): 50–100 L
- General workshop (1–2 bays, regular air tools): 100–200 L
- High air-use tools (DA sanders, continuous blow-off, small blasting, frequent spray): 200–300 L (or consider adding a second receiver and improving piping)
Reality check: if you’re running a sander or spray gun continuously and the compressor’s delivered CFM is below your effective CFM, a bigger tank only buys minutes. Your long-term fix is higher delivered CFM, better distribution (larger pipe, fewer restrictions), or changing the compressor type for continuous demand.
Tank capacity vs pump size: avoid two common mistakes
- Big tank + small pump: feels okay at first, then pressure falls and the pump runs almost nonstop to recover.
- Big pump + tiny tank: meets CFM but can short-cycle, especially if cut-in/cut-out is narrow and demand is intermittent.
When comparing “Piston Air Compressor Malaysia” options, ask for a recommendation that matches both delivered air and receiver size for your duty pattern, not only a horsepower figure.
Step 5: Match your calculated demand to real compressor specs (and pick single-stage vs two-stage)
Now you have a target: required delivered CFM at working pressure, plus a reasonable tank range. Use that to shortlist models.
What to compare on the datasheet
- Delivered air / FAD at pressure (e.g., at 7 bar or 10 bar)
- Maximum pressure (don’t pay for pressure you don’t need)
- Motor power (a supporting indicator, not the sizing method)
- Duty rating / recommended run time (especially important for high-use workshops)
- Noise and cooling (workshop comfort and pump life)
Single-stage vs two-stage in workshops
As a general guide:
- Single-stage piston compressors are common for intermittent workshop use at moderate pressure. They are cost-effective for lower duty cycles.
- Two-stage piston compressors are better suited when you need higher pressure, better efficiency at pressure, or more serious duty cycles (more continuous air use). They can be a stronger fit for sanding, longer spray sessions, or multiple users—assuming the delivered CFM matches.
Either way, remember the core sizing logic: delivered CFM at your required pressure must meet or exceed your effective simultaneous CFM (plus allowance). Tank size then improves stability and cycling.
Quick sizing checklist + decision table (printable)
Use this checklist to avoid common undersizing traps before you request quotations:
- List tools and confirm each tool’s CFM/L/min at stated pressure.
- Decide target tool inlet pressure and estimate distribution losses.
- Apply duty factors to get effective simultaneous CFM.
- Add 10–25% for leaks and growth.
- Shortlist compressor models by delivered air/FAD at the required pressure.
- Pick a receiver size to reduce pressure swing and cycling (but don’t use it to mask a CFM deficit).
| Workshop pattern | Typical tools | What matters most | Common sizing direction | Main risk if undersized |
|---|---|---|---|---|
| Intermittent service bay | Impact wrench, tyre inflator, blow gun | Stable pressure recovery, modest CFM | Moderate delivered CFM; 100–200 L tank | Pressure dips during repeated impacts; frequent waiting |
| Body & paint with prep | DA sander, spray gun, blow-off | Delivered CFM at pressure, air quality and dryness | Higher delivered CFM; 200–300 L tank; consider two-stage | Orange peel / inconsistent atomisation; nonstop running and heat |
| Multi-user workshop | Two tools used at once (mixed) | Simultaneous effective CFM + distribution design | Add duty-based CFMs; allow 20–25% growth; check pipe size | Unstable pressure at far drops; tool performance complaints |
| “Always-on” air demand | Continuous sanding, constant blow-off, small blasting | Duty cycle capability and continuous air delivery | High delivered CFM; validate run time; may justify rotary screw | Overheating, rapid wear, frequent breakdowns |
Conclusion: size by delivered CFM first, then use the tank to smooth real workflow
To size a piston compressor correctly, separate two jobs: the pump.
Useful product categories (for comparing options)
Frequently Asked Questions
Is tank size (litres) or CFM more important when choosing a piston compressor?
CFM (delivered air at your working pressure) is more important. The tank only stores air to smooth short spikes and reduce cycling; it cannot compensate for a pump that can’t keep up with your effective simultaneous tool demand. Choose the compressor by delivered CFM first, then select a tank size that gives acceptable pressure stability and start/stop frequency.
How do I estimate duty cycle for workshop tools if I don’t have measurements?
Use your busiest 10–20 minutes as a reference. Impacts and tyre inflators are usually bursty (around 0.2–0.4 duty), while sanders and continuous blow-off can be high (0.7–1.0). Multiply each tool’s stated CFM by the estimated duty factor, then add an allowance for leaks and future growth. If unsure, be conservative for the tools you run longest.
What if my tools need 90 psi but the compressor is set much higher?
Setting the compressor much higher than needed can increase leaks and energy use and may not solve performance issues if the real problem is insufficient CFM or excessive pressure drop in hoses, filters, and couplers. A better approach is to set a reasonable cut-in/cut-out, use regulators at drops, and improve distribution (pipe size, fewer restrictions) while ensuring delivered CFM meets demand.
Do I need a two-stage piston compressor for an automotive workshop?
Not always. Two-stage piston compressors are typically a better fit when you need higher pressure, better efficiency at pressure, or heavier duty cycles (more continuous sanding, frequent spray work, multiple users). If your demand is intermittent and your delivered CFM at the required pressure is adequate, a single-stage unit can be sufficient. Size based on duty-adjusted CFM and workflow, not stage count alone.
Can I fix pressure drops by adding a larger receiver tank?
A larger tank can reduce short-term pressure swings and delay the drop during brief high-demand bursts, but it won’t fix a long-duration CFM deficit. If the pump’s delivered air is below what your tools consume over time, pressure will still fall and the compressor will run hot trying to recover. Check delivered CFM, distribution losses, and leak rate before relying on more storage.
Need help sizing a piston compressor for your workshop?
Apexair can help you match delivered CFM, working pressure, and tank capacity to your real tool usage—so you avoid undersizing, excessive cycling, and unstable pressure at the point of use. As an authorised ELGi distributor with an experienced technical team, we support selection, installation, servicing, and fast breakdown response across Malaysia.